history, prices & availability
HOW IT STARTED
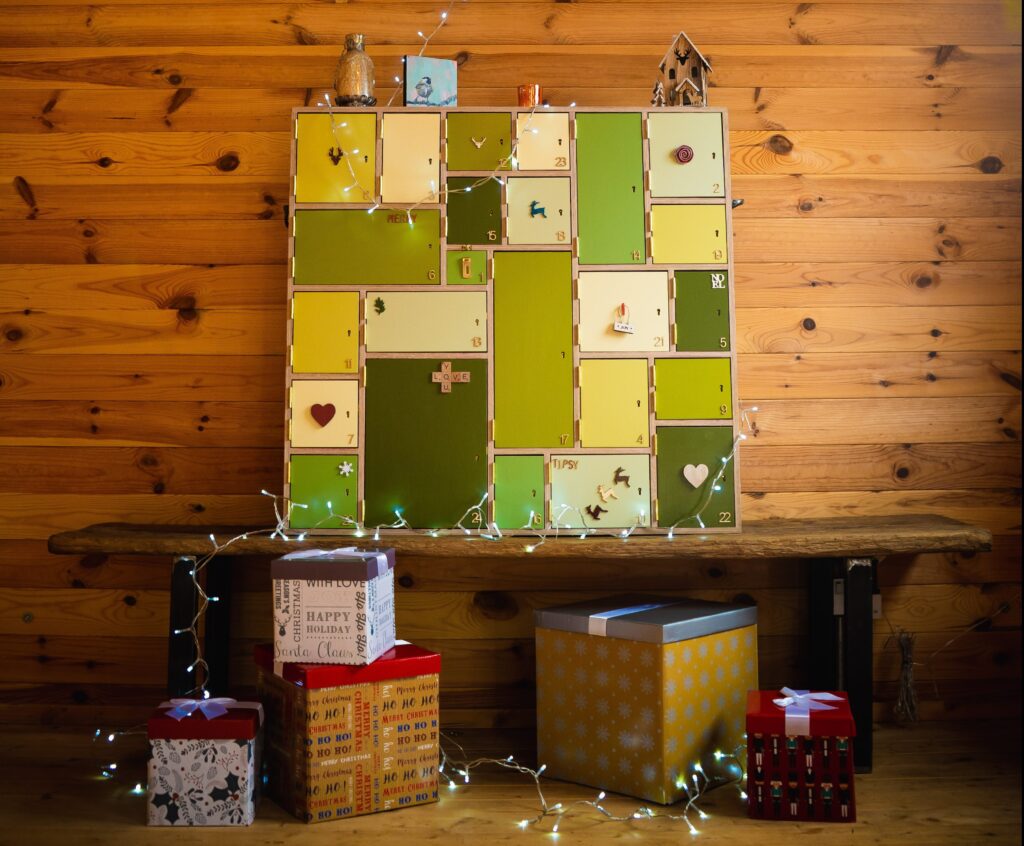
The emphasis on little boxes was one reason why I came up with this design, as when researching found very little choice for larger advent calendars. But the main reason was that I really wanted to surprise my wife with a truly unique gift. When it comes to Christmas we ask each other what we would like and struggle to come up with new ideas. I have found that giving her presents, not necessarily expensive but what she enjoys, added more value to each gift. Her favorite face cream, pair of earrings or a bag of Harribos, however big or small, expensive or cheap, serious or a joke, worked.

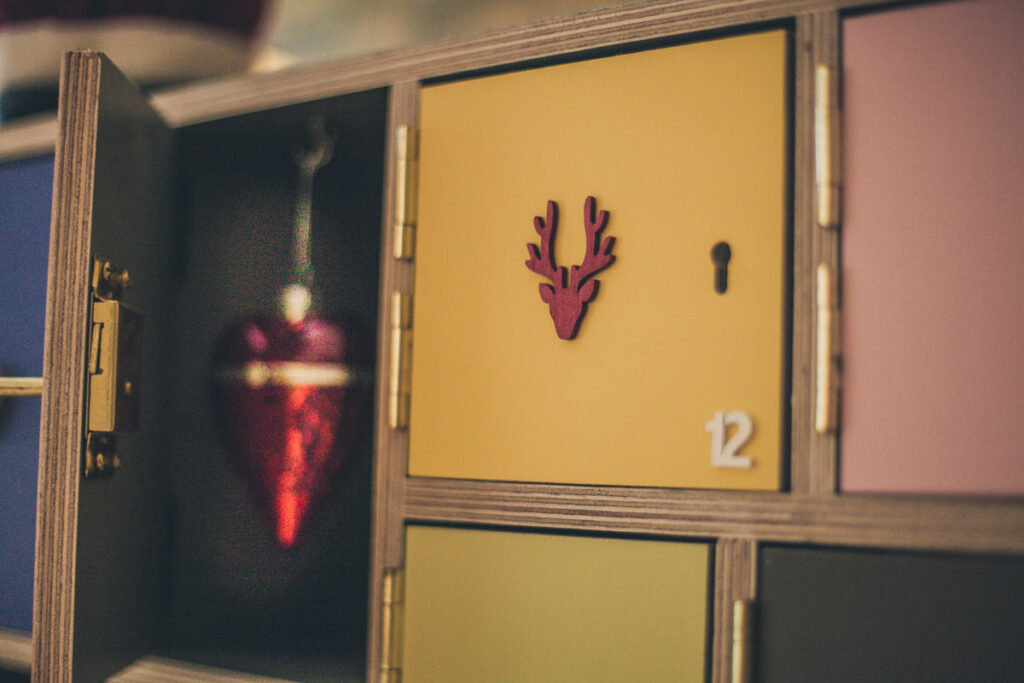
My favourite gift to her was a red heart shaped bauble which opened to reveal a crisp new printed £5 note with the registration number having her initials and her year of birth. The idea of wrapping little presents that I know my wife likes, to put in a stocking is fun, but the large advent calendar added to the excitement of the gifts.
And so I made my first Advent Calendar. It was a great success, with my wife’s friends and colleagues enjoying, (with a certain amount of envy) the daily news of what was behind each locked door.
With this, I developed the Advent Calendar to what you see here.

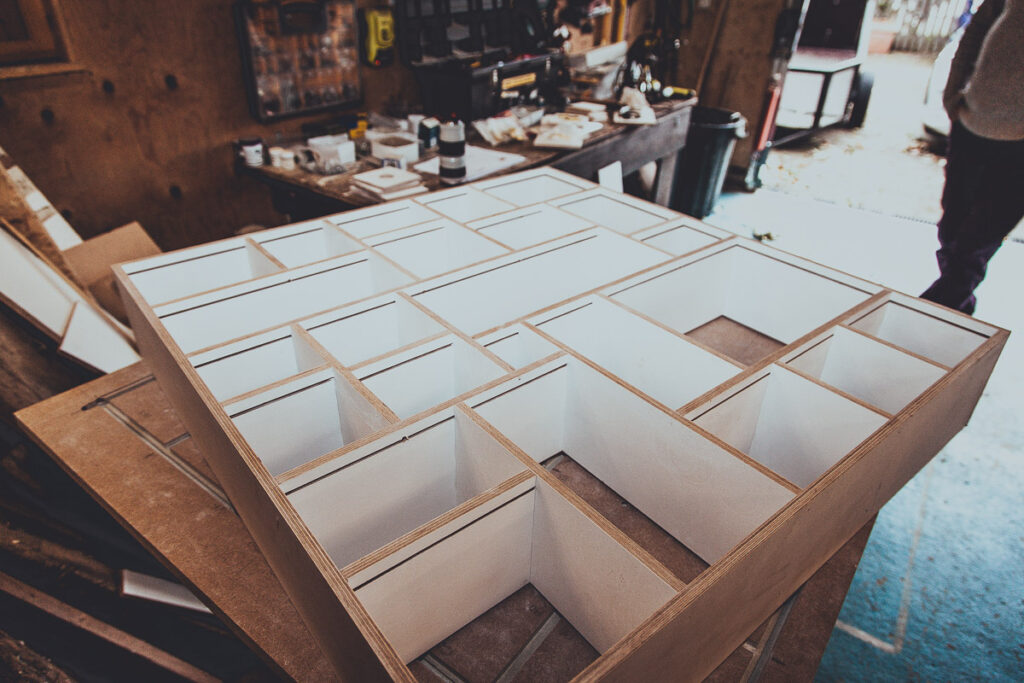

CONSTRUCTION PROCESS
Step by Step
- 12mm ply wood is pre-cut to size.
- Glue and nail together in a stencil.
- Make the key hole and drill screw position holes for the hinges and lock.
- Hand paint the carcass, back plate and the inside of the doors with two coats of a Farrow & Ball egg shell finish paint. Leaving the ply wood edge exposed.
- Hand paint the doors with two or three coats of F & B estate emulsion.
- Screw the lock and hinges to the doors.
- Drill position holes for the hinges on the carcass.
- Fix doors and the back plate to the carcass. Fit the brass padlock latch to the draw.
- Add the wrought Iron drop handles to the side.
- Add the advent numbers
- Decorate.
- Measurements 838mm x 904mm x 150mm
